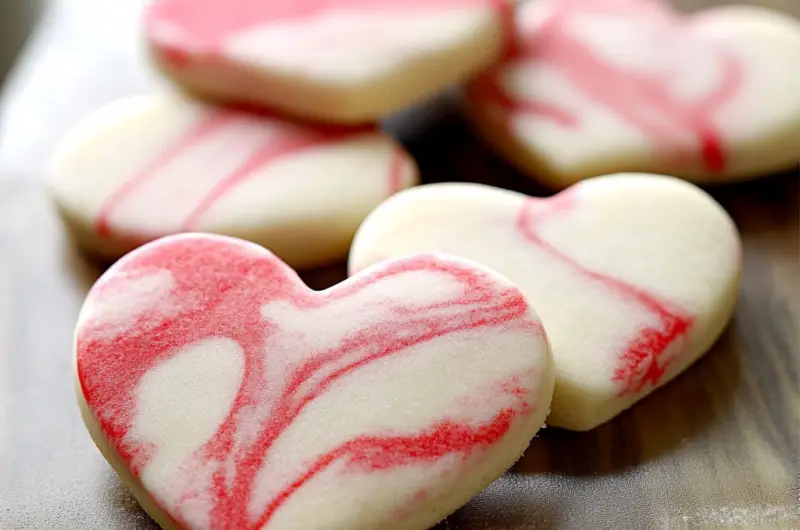
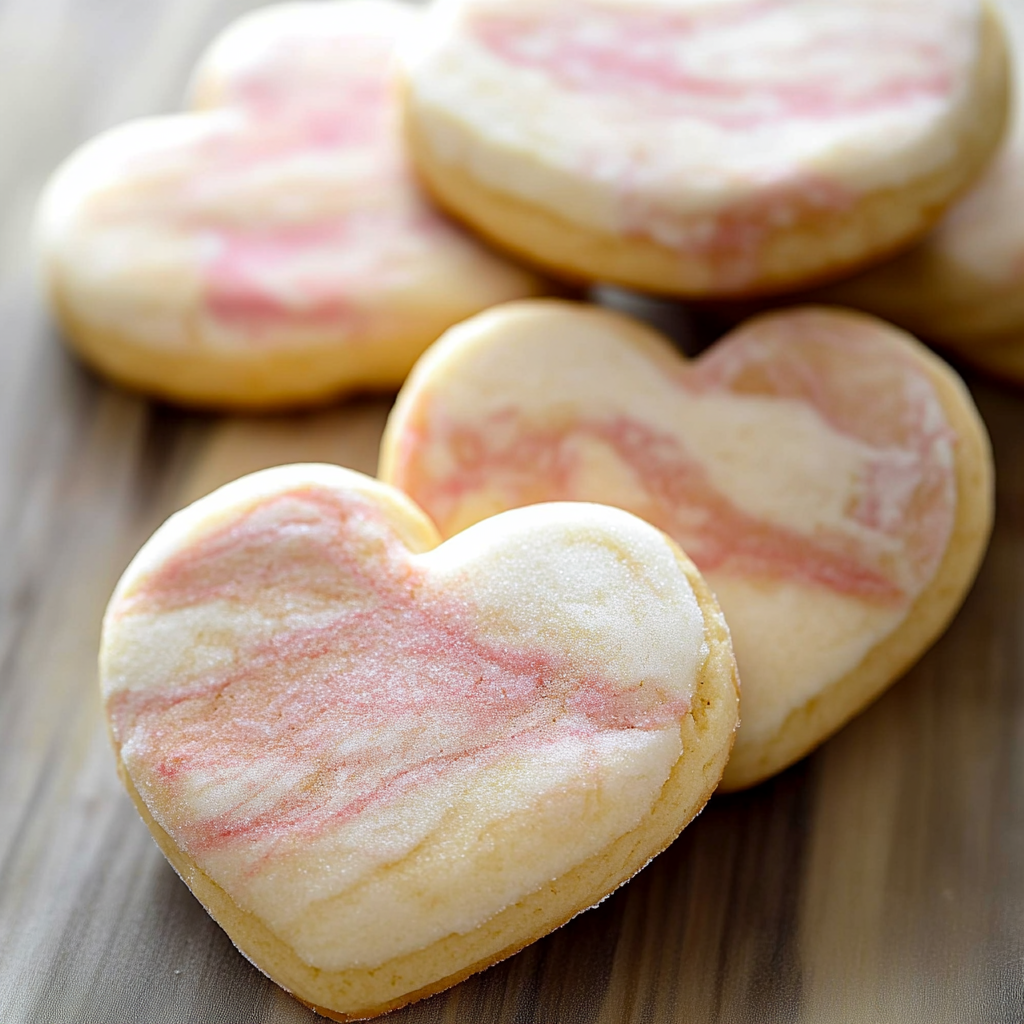
Valentine’s Day is a celebration of love and affection, and what better way to express your feelings than with a batch of delicious homemade treats? Marbled Valentine Sugar Cookies are not only visually stunning but also incredibly tasty. These delightful cookies feature a beautiful swirl of colors that evoke the spirit of the holiday. With their tender texture and sweet flavor, they are sure to impress your loved ones. Whether you’re hosting a romantic dinner or planning a fun gathering with friends, these cookies make the perfect addition to any occasion. Plus, they are easy to make and can be customized with your favorite colors and flavors. In this article, you will find everything you need to create these charming treats from scratch. So roll up your sleeves and get ready to bake some love into every bite!
Why You’ll Love This Marbled Valentine Sugar Cookies
-
- Visually Stunning: The marbled effect gives these cookies an eye-catching appearance that is perfect for any Valentine’s Day celebration.
-
- Deliciously Sweet: Made with simple ingredients, these sugar cookies have a delightful sweetness that everyone will enjoy.
-
- Customizable Flavors: You can easily adapt the flavors and colors to suit your preferences or match different occasions.
- Fun Activity: Baking together can be a wonderful bonding experience for couples or families during special occasions.
Ingredients for Marbled Valentine Sugar Cookies
Here’s what you’ll need to make this delicious dish:
-
- All-Purpose Flour: Essential for structure; sift it before measuring for best results.
-
- Baking Powder: Helps the dough rise and creates a soft texture in the cookies.
-
- Salt: Balances the sweetness; use fine salt for even distribution.
-
- Unsalted Butter: Provides richness; ensure it’s softened for easier mixing.
-
- Sugar: Granulated sugar adds sweetness; consider using fine sugar for smoother dough.
-
- Eggs: Bind the ingredients together; use large eggs at room temperature for optimal mixing.
-
- Vanilla Extract: Adds flavor depth; choose pure vanilla extract for the best taste.
- Food Coloring: Use gel food coloring to achieve vibrant hues without altering the dough’s consistency.
The full ingredients list, including measurements, is provided in the recipe card directly below.

How to Make Marbled Valentine Sugar Cookies
Follow these simple steps to prepare this delicious dish:
Step 1: Prepare Your Oven
Preheat your oven to 350°F (175°C) while lining a baking sheet with parchment paper.
Step 2: Mix Dry Ingredients
In a bowl, whisk together all-purpose flour, baking powder, and salt until combined.
Step 3: Cream Butter and Sugar
In another bowl, beat softened unsalted butter and granulated sugar until light and fluffy. This step ensures a tender cookie.
Step 4: Add Eggs and Vanilla
Mix in eggs one at a time along with vanilla extract until fully incorporated into the butter-sugar mixture.
Step 5: Combine Wet and Dry Ingredients
Gradually add the dry mixture into the wet mixture until just combined. Do not overmix as this can toughen your cookies.
Step 6: Create Marble Effect
Divide the dough into two bowls. Color one half with your chosen food coloring. Gently fold both colors together without fully blending them to create that beautiful marbling.
Finally, scoop rounded tablespoons of dough onto the prepared baking sheet. Bake in preheated oven for about 10-12 minutes or until edges are lightly golden. Transfer to wire racks to cool completely before serving.

Tips and Tricks
Here are some helpful tips to ensure the best results for your dish:
-
- Chill Your Dough: For cleaner edges and less spreading while baking, chill the dough in the refrigerator for about 30 minutes before scooping.
- Use Quality Ingredients: Opting for high-quality butter and pure extracts can greatly enhance flavor in your baked goods.
-
- Experiment with Colors: Feel free to mix different shades of food coloring to create unique effects on your cookies.
-
- Select Cookie Cutters Wisely: Choose heart-shaped cutters or other Valentine’s-themed shapes for added charm!
With these guidelines in mind, you’re all set to create stunning Marbled Valentine Sugar Cookies that will surely steal hearts! Enjoy baking!
How to Serve Marbled Valentine Sugar Cookies
This Marbled Valentine Sugar Cookies is versatile and pairs wonderfully with:
Fresh Fruit Platter: The sweetness of the cookies complements the tartness of seasonal fruits beautifully.
Hot Chocolate: A warm, chocolatey beverage enhances the delightful flavors of the cookies, making for a cozy treat.
Coffee or Tea: A hot cup of your favorite brew balances the sweetness, creating a perfect afternoon snack.
Ice Cream: The creamy texture of ice cream adds richness and makes for an indulgent dessert experience.
Feel free to pair it with your favorite sides for a personalized meal!

Make Ahead and Storage
- Make Ahead: You can prepare the cookie dough up to three days in advance. Store it wrapped in plastic wrap in the refrigerator until you’re ready to bake.
- Storing: Once baked, store the Marbled Valentine Sugar Cookies in an airtight container at room temperature for up to one week. For longer storage, freeze them for up to three months.
- Reheating: To enjoy them warm, simply place the cookies on a baking sheet and reheat in a preheated oven at 350°F (175°C) for about 5-7 minutes.
Suggestions for Marbled Valentine Sugar Cookies
Choose the Right Ingredients
Using high-quality ingredients is key to the success of your Marbled Valentine Sugar Cookies. Avoid using old or expired baking powder, as this can prevent your cookies from rising properly. Opt for fresh butter, quality vanilla extract, and good flour for the best flavor and texture. When selecting food coloring, choose gel-based colors instead of liquid ones, as they provide a richer hue without altering the dough’s consistency. This attention to detail in your ingredients will lead to scrumptious cookies that not only look beautiful but taste fantastic.
Don’t Overmix the Dough
Overmixing your cookie dough can lead to tough cookies rather than the soft, tender treats you desire. When mixing your wet and dry ingredients, do so just until combined. If you see streaks of flour, it’s okay; a few lumps will disappear as the dough rests. Allowing the dough to chill before rolling it out also helps improve its texture and makes it easier to handle. Remember, the goal is to keep that perfect balance of chewy and soft for your Marbled Valentine Sugar Cookies.
Pay Attention to Baking Time
Baking time is crucial for achieving perfectly baked Marbled Valentine Sugar Cookies. Keep a close eye on them as they bake; they should be lightly golden around the edges but still soft in the center when you remove them from the oven. Overbaking can result in hard cookies that lose their delightful chewiness. It’s wise to start checking them a couple of minutes before the suggested baking time, allowing you to achieve that perfect cookie every time.
Use Parchment Paper or Silicone Mats
Using parchment paper or silicone baking mats can make a significant difference in how your Marbled Valentine Sugar Cookies turn out. These surfaces prevent sticking and promote even baking. Avoid greasing your baking sheets directly, as this can cause the cookies to spread too much, losing their beautiful marbled effect. Instead, line your sheets with parchment paper or use silicone mats for easy cleanup and perfectly baked cookies.

FAQs for Marbled Valentine Sugar Cookies
What makes Marbled Valentine Sugar Cookies special?
Marbled Valentine Sugar Cookies stand out due to their unique visual appeal and delicious flavor combination. The marbling technique blends two different colored doughs, typically red and white or pink, creating a stunning design reminiscent of hearts and love—perfect for Valentine’s Day celebrations. Additionally, these sugar cookies are soft and buttery with just the right amount of sweetness. They can be customized with various flavors or decorations, making them an excellent treat for any occasion.
Can I use different colors for marbling?
Absolutely! While traditional Marbled Valentine Sugar Cookies often feature red and white hues associated with Valentine’s Day, you can experiment with any color combinations that suit your preferences or themes. For example, pastel colors work wonderfully for springtime events, while bright colors could add fun flair for birthdays or festive gatherings. Just ensure you’re using gel food coloring to maintain consistent dough texture while achieving vibrant colors.
How can I store leftover Marbled Valentine Sugar Cookies?
To keep your Marbled Valentine Sugar Cookies fresh after baking, store them in an airtight container at room temperature. This helps maintain their soft texture while preventing them from drying out. If you want to extend their shelf life further, consider refrigerating them; however, allow them to come back to room temperature before serving for optimal flavor and chewiness. These cookies can last up to a week if stored properly!
Can I freeze Marbled Valentine Sugar Cookies?
Yes! Freezing is an excellent way to preserve your Marbled Valentine Sugar Cookies if you’ve made a large batch or want to save some for later enjoyment. To freeze them effectively, ensure they are completely cooled first. Then place them in an airtight container separated by layers of parchment paper to prevent sticking. They can be frozen for up to three months! When you’re ready to enjoy them again, simply thaw at room temperature before serving.

Conclusion
Marbled Valentine Sugar Cookies are a delightful treat that combines beauty with taste; however, avoiding common mistakes is essential for success in making these cookies at home. Using high-quality ingredients ensures optimal flavor while avoiding overmixing keeps them tender. Pay close attention to baking times and utilize parchment paper or silicone mats for even results every time you bake. With proper storage methods down pat, including freezing options if desired, you can enjoy these festive cookies long after Valentine’s Day has passed! Happy baking!
Delightful Marbled Valentine Sugar Cookies Recipe
Course: All Recipes, Desserts24 cookies
servings20
minutes12
minutes120
kcalIngredients
All-purpose flour
Baking powder
Salt
Unsalted butter
Granulated sugar
Eggs
Vanilla extract
Gel food coloring
Directions
- Preheat oven to 350°F (175°C) and line a baking sheet with parchment paper.
- In a bowl, whisk together flour, baking powder, and salt.
- Beat softened butter and sugar until light and fluffy.
- Mix in eggs one at a time with vanilla extract.
- Gradually combine wet and dry ingredients without overmixing.
- Divide dough; color one half with gel food coloring. Fold gently for a marbled effect.
- Scoop rounded tablespoons onto the baking sheet and bake for 10-12 minutes until edges are golden.
Notes
- Chill dough for cleaner edges and experiment with different colors for marbling.


