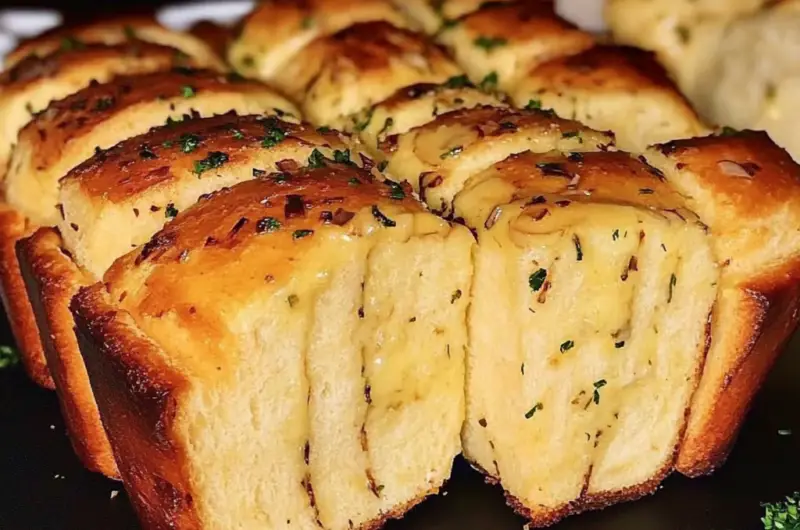
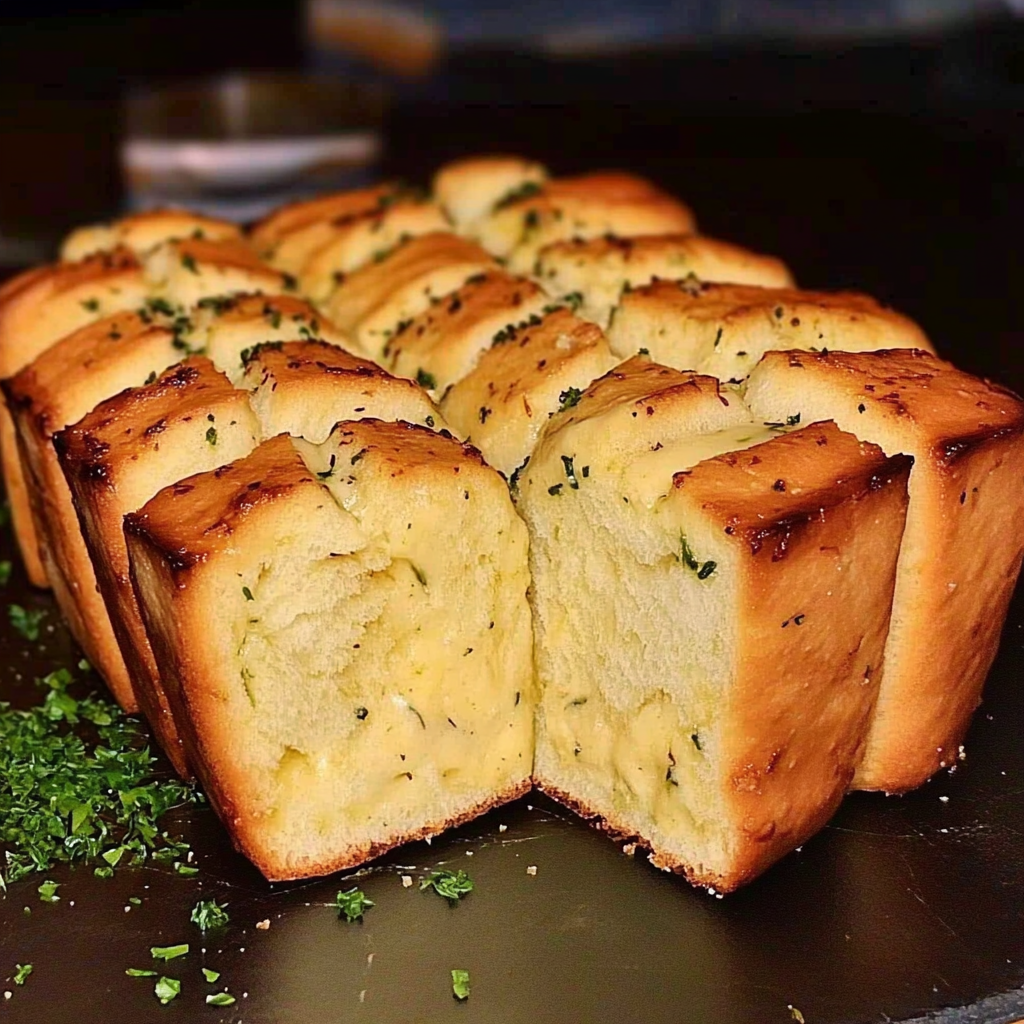
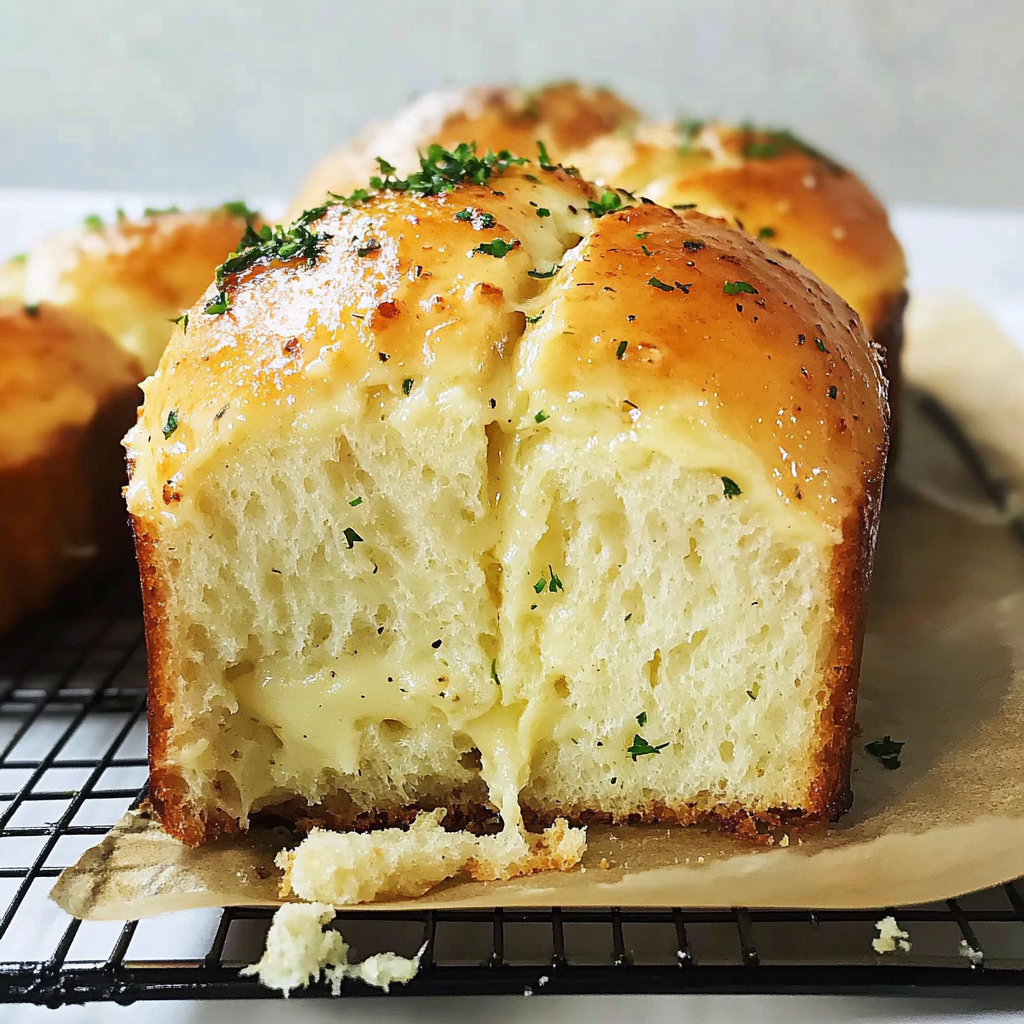
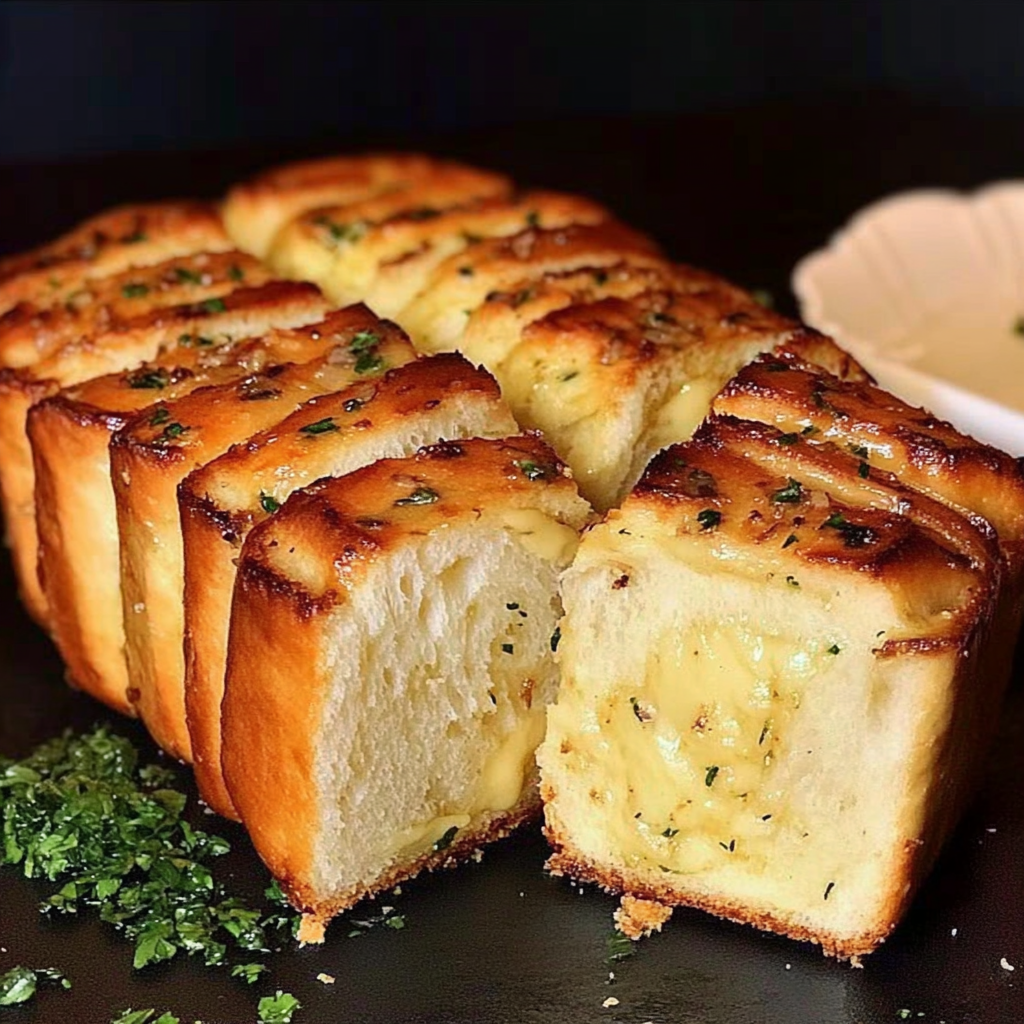
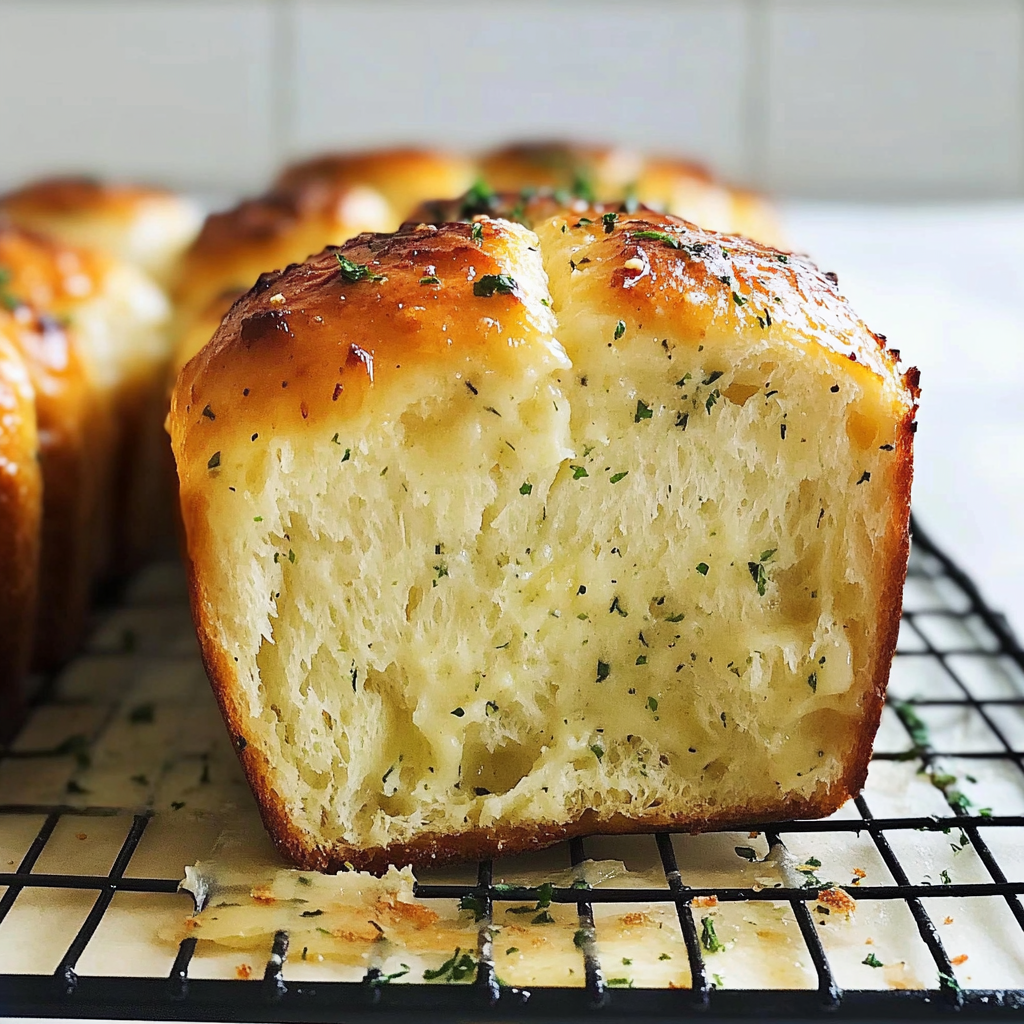
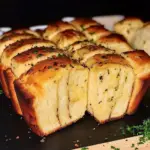
Garlic Butter Bread Rolls are the ultimate side dish that can elevate any meal. Imagine soft, fluffy rolls infused with rich garlic flavor and enveloped in melted butter; they are a delight to both your taste buds and your senses. This recipe is not just about satisfying your cravings; it’s about creating an unforgettable experience for family gatherings or cozy dinners at home. The best part? You don’t need to be a culinary expert to nail this recipe! Follow our step-by-step guide to whip up these irresistible rolls in no time. They pair wonderfully with soups, salads, or simply enjoyed on their own. Once you try these Garlic Butter Bread Rolls, they will quickly become a staple at your dinner table. Whether you’re serving them at a holiday feast or a casual weeknight dinner, they’re guaranteed to impress.
Why You’ll Love This Garlic Butter Bread Rolls
- Quick and Easy: Minimal prep time and straightforward steps make this recipe stress-free, even for novice cooks
- Flavorful and Versatile: Enjoy outstanding flavor with ingredients you can easily customize by adding your favorites or adjusting spices
- Perfect for Any Occasion: Ideal for casual gatherings, holiday celebrations, or weeknight dinners
Ingredients for Garlic Butter Bread Rolls
Here’s what you’ll need to make this delicious dish:
- All-Purpose Flour: Essential for structure; opt for unbleached flour for a more natural flavor profile.
- Active Dry Yeast: This ingredient helps the dough rise; ensure it’s fresh for the best results.
- Sugar: A small amount is used to feed the yeast and enhance the overall flavor of the rolls.
- Salt: Essential for seasoning; it balances flavors while also controlling yeast activity.
- Warm Water: Activates the yeast; use water around 110°F (43°C) for optimal results.
- Melted Butter: Adds richness and flavor; using unsalted butter allows better control over salt levels.
- Fresh Garlic: Provides that distinctive garlic flavor; finely minced cloves work best.
The full ingredients list, including measurements, is provided in the recipe card directly below.
Satisfy your cravings with this incredible recipe!

How to Make Garlic Butter Bread Rolls
Follow these simple steps to prepare this delicious dish:
Step 1: Prepare the Dough
In a large mixing bowl, combine warm water, sugar, and yeast. Let it sit until frothy, about 5-10 minutes.
Step 2: Mix Ingredients
Add melted butter and salt into the yeast mixture. Gradually stir in all-purpose flour until a dough forms.
Step 3: Knead the Dough
Transfer the dough onto a floured surface and knead it for about 8-10 minutes until smooth and elastic.
Step 4: Let It Rise
Place the kneaded dough in an oiled bowl. Cover with a clean cloth and let it rise in a warm place until doubled in size—approximately one hour.
Step 5: Shape the Rolls
Once risen, punch down the dough gently and divide it into equal pieces. Shape each piece into a ball.
Step 6: Bake
Arrange shaped rolls on a greased baking sheet. Brush with melted garlic butter and bake in a preheated oven at 375°F (190°C) for about 20-25 minutes until golden brown.
Transfer them to plates and serve warm with additional garlic butter drizzled on top.
Tips and Tricks
Here are some helpful tips to ensure the best results for your dish:
- Check Your Yeast: Always check if your yeast is active by letting it foam before combining it with other ingredients.
- Kneading Technique: Use the heel of your hand when kneading dough to develop gluten effectively.
- Pans Matter: Use dark metal pans for more even browning; light-colored pans may result in unevenly baked rolls.
Hungry for more? Here’s a perfect to try next!
How to Serve Garlic Butter Bread Rolls
This Garlic Butter Bread Rolls is versatile and pairs wonderfully with:
- Rice or Potatoes: A hearty base that soaks up the delicious sauce.
- Fresh Salad: Adds a crisp and refreshing contrast to the rich flavors of the dish.
- Crusty Bread: Perfect for enjoying every last drop of the flavorful sauce.
Feel free to pair it with your favorite sides for a personalized meal!
Make Ahead and Storage
- Make Ahead: You can prepare the dough for Garlic Butter Bread Rolls up to one day in advance. After mixing, let it rise until doubled in size, then punch it down and refrigerate. Bring it back to room temperature before shaping and baking, which usually takes about 30 minutes.
- Storing: Store leftover rolls in an airtight container at room temperature for up to three days. For longer preservation, freeze them in a freezer-safe bag for up to two months. Ensure they are completely cooled before storage to avoid moisture buildup.
- Reheating: To reheat, preheat your oven to 350°F (175°C). Place the rolls on a baking sheet and cover them with aluminum foil to retain moisture. Heat for about 10-15 minutes or until warmed through. Alternatively, use a microwave for softer rolls; heat in short bursts of 15 seconds until warm.
The flavor doesn’t stop here—try our recipe for even more deliciousness!
Suggestions for Garlic Butter Bread Rolls
Avoid Overworking the Dough
One common mistake when making garlic butter bread rolls is overworking the dough. Kneading is essential, but too much can lead to tough, dense rolls rather than light and fluffy ones. When you knead the dough, aim for a smooth and elastic texture. Once it reaches this point, stop! Allowing the gluten to relax is crucial for achieving that perfect airy quality in your rolls. Remember, gentle handling will yield better results. Keep an eye on the consistency and texture as you work; this will make a noticeable difference in your final product.
Use Fresh Ingredients
Another tip to enhance your garlic butter bread rolls is to use fresh ingredients. Stale yeast or expired flour can ruin your batch before it even starts rising. Always check the expiration dates on your yeast and flour before beginning your baking adventure. Fresh garlic also plays a significant role; it brings out vibrant flavors in your garlic butter mix. Choosing high-quality butter ensures that every bite is rich and delicious. Investing in fresh ingredients will elevate the taste of your rolls and provide a satisfying experience for everyone who enjoys them.
Don’t Skip the Rising Time
Allowing your dough ample time to rise is crucial for creating soft garlic butter bread rolls. Many home bakers make the mistake of rushing this step, thinking they can save time. However, under-proofed dough leads to compact rolls lacking that desired fluffiness. When you let the dough rise until it has doubled in size, you’re allowing those air pockets to form, which creates a light texture once baked. Be patient—this part of the process significantly enhances flavor and texture, bringing you one step closer to perfection.
Monitor Baking Temperature
Baking temperature plays a pivotal role in how well your garlic butter bread rolls turn out. If your oven runs too hot, you risk burning the tops while leaving the insides raw or doughy. Conversely, if it’s not hot enough, you’ll end up with pale and undercooked rolls that lack that golden-brown finish we all love. Using an oven thermometer can help ensure accuracy in temperature settings. Preheat your oven fully before placing the rolls inside; this allows them to bake evenly and develop that beautiful crust while remaining soft within.
Hungry for more? Here’s a perfect to try next!
FAQs
How do I store leftover garlic butter bread rolls?
Storing leftover garlic butter bread rolls properly ensures they remain fresh for longer periods. Allow the rolls to cool completely before storing them in an airtight container or resealable plastic bag at room temperature. They should last for about 2-3 days stored this way. For longer storage, consider freezing them instead! Wrap each roll tightly in plastic wrap and place them in a freezer-safe bag for up to three months. When ready to enjoy again, simply thaw them at room temperature or reheat them in a warm oven for that freshly baked taste.
Can I use different herbs with my garlic butter bread rolls?
Absolutely! While traditional garlic butter bread rolls feature garlic as their main flavor component, feel free to get creative with herbs! Adding fresh or dried herbs like parsley, rosemary, or thyme can enhance the flavor profile significantly. Simply mix these herbs into your garlic butter blend before brushing it onto the rolls or incorporating them into the dough itself during preparation. This flexibility allows you to personalize each batch according to personal preferences or seasonal availability of herbs.
What type of flour works best for making these rolls?
When making garlic butter bread rolls, all-purpose flour is typically considered ideal due to its balanced gluten content, which contributes to a soft texture without being overly dense or chewy. However, if you prefer a heartier roll with added nutrition, whole wheat flour can be used as well; just keep in mind that it may alter the final texture slightly—aiming for about 50% whole wheat mixed with all-purpose flour often yields great results! Experimenting with different flours can lead you toward discovering unique flavors.
Can I make these rolls ahead of time?
Yes! Preparing garlic butter bread rolls ahead of time can save you stress on busy days while still allowing everyone to enjoy warm homemade goodness. You have several options: You can prepare the dough and let it rise until doubled in size before refrigerating it overnight—this slow fermentation develops deeper flavors without compromising quality. Alternatively, you could bake the rolls completely and store them in an airtight container once cooled; simply reheat them before serving! Both methods allow convenience while maintaining deliciousness.
Looking for more delicious inspiration? Check out this recipe!

Conclusion for Garlic Butter Bread Rolls
In summary, mastering garlic butter bread rolls involves attention to detail during preparation and baking processes. Avoid common mistakes such as overworking dough or neglecting rising times; these factors significantly affect texture and flavor outcomes. Always opt for fresh ingredients like high-quality flour and vibrant garlic while monitoring baking temperatures closely for optimal results. By following these tips and answering frequently asked questions regarding storage and customization options, anyone can create delightful homemade treats perfect for any occasion! Enjoy experimenting with variations while sharing this scrumptious recipe with family and friends.
Garlic Butter Bread Rolls
- Total Time: 40 minutes
- Yield: Approximately 12 servings 1x
Description
Garlic Butter Bread Rolls are a heavenly addition to any meal, featuring a soft and fluffy texture infused with the rich essence of garlic and generously brushed with melted butter. These rolls are incredibly easy to prepare, making them perfect for novice cooks and seasoned bakers alike. Whether served alongside soups, salads, or enjoyed on their own with extra garlic butter drizzled on top, these homemade delights are sure to impress your family and friends. Imagine the aroma wafting through your kitchen as these rolls bake to golden perfection—once you try this recipe, Garlic Butter Bread Rolls will undoubtedly become a cherished staple at your table.
Ingredients
- 3 ½ cups all-purpose flour
- 2 ¼ teaspoons active dry yeast
- 2 tablespoons sugar
- 1 teaspoon salt
- 1 cup warm water (110°F)
- 4 tablespoons melted unsalted butter
- 4 cloves fresh garlic (minced)
Instructions
- In a mixing bowl, combine warm water, sugar, and yeast. Let sit until frothy (5-10 minutes).
- Stir in melted butter and salt, then gradually add flour to form a dough.
- Knead on a floured surface for 8-10 minutes until smooth.
- Place dough in an oiled bowl, cover, and let rise in a warm spot until doubled (about 1 hour).
- After rising, punch down the dough, divide it into equal pieces, and shape each into a ball.
- Arrange on a greased baking sheet, brush with melted garlic butter, and bake at 375°F for 20-25 minutes until golden.
Notes
Ensure your yeast is fresh for optimal rising.
Feel free to mix in herbs like parsley or rosemary for added flavor.
For best results, don’t rush the rising time; patience will yield fluffier rolls.
- Prep Time: 15 minutes
- Cook Time: 25 minutes
- Category: Side Dish
- Method: Baking
- Cuisine: American
Nutrition
- Serving Size: 1 serving
- Calories: 150
- Sugar: 1g
- Sodium: 220mg
- Fat: 6g
- Saturated Fat: 3g
- Unsaturated Fat: 2g
- Trans Fat: 0g
- Carbohydrates: 22g
- Fiber: 1g
- Protein: 4g
- Cholesterol: 10mg

