
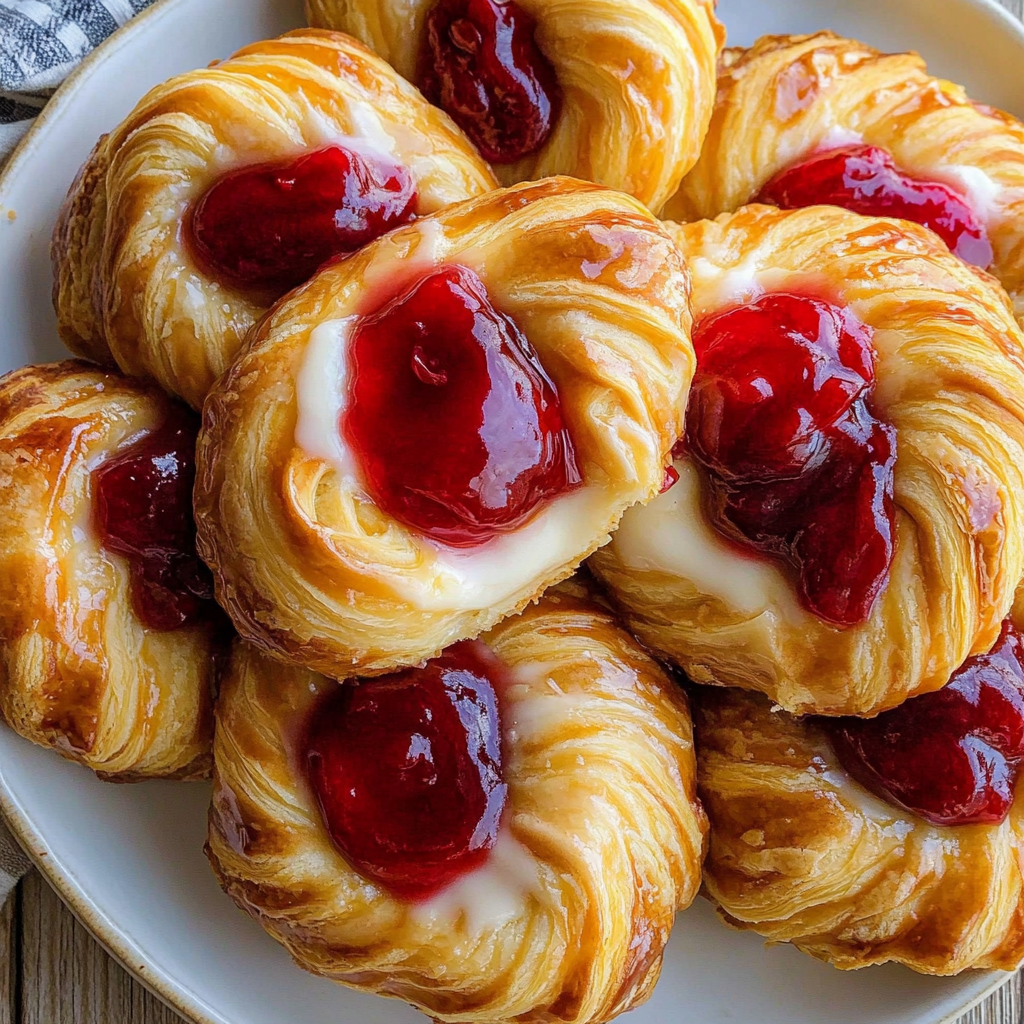
Cheesecake Danish is a delightful blend of rich cream cheese filling and flaky pastry that makes for an irresistible treat. This recipe combines the best of both worlds: the creamy texture of cheesecake and the buttery goodness of a Danish pastry. Whether you serve it for breakfast or as a dessert, this Cheesecake Danish will impress your family and friends alike. The preparation is straightforward, making it an ideal choice for novice bakers who want to create something special without too much fuss. With just a few simple ingredients and steps, you can whip up this delicious dish in no time. The combination of flavors and textures is sure to satisfy your sweet tooth while providing a comforting experience with each bite. So gather your ingredients and get ready to make a mouthwatering Cheesecake Danish that everyone will love!
Why You’ll Love This Cheesecake Danish
- Quick and Easy: Minimal prep time and straightforward steps make this recipe stress-free, even for novice cooks
- Flavorful and Versatile: Enjoy outstanding flavor with ingredients you can easily customize by adding your favorites or adjusting spices
- Perfect for Any Occasion: Ideal for casual gatherings, holiday celebrations, or weeknight dinners
Ingredients for Cheesecake Danish
Here’s what you’ll need to make this delicious dish:
- Puff Pastry Sheets: Use thawed sheets of puff pastry from the freezer section; they provide the perfect flaky texture.
- Cream Cheese: Choose full-fat cream cheese for a rich filling; ensure it’s softened at room temperature before mixing.
- Sugar: Granulated sugar sweetens the cream cheese filling; adjust the amount to suit your taste.
- Vanilla Extract: Pure vanilla extract adds depth to the flavor profile; avoid imitation extracts for best results.
- Eggs: One large egg helps bind the filling together; using an extra egg yolk can create a richer texture.
The full ingredients list, including measurements, is provided in the recipe card directly below.
Don’t stop here—check out this equally delicious recipe!

How to Make Cheesecake Danish
Follow these simple steps to prepare this delicious dish:
Step 1: Preheat Your Oven
Preheat your oven to 375°F (190°C). Line a baking sheet with parchment paper to prevent sticking.
Step 2: Prepare Puff Pastry
Roll out the thawed puff pastry sheets on a lightly floured surface. Cut them into squares or rectangles according to your preference.
Step 3: Make the Cream Cheese Filling
In a mixing bowl, combine softened cream cheese, sugar, vanilla extract, and one egg. Beat until smooth and creamy.
Step 4: Assemble the Danishes
Place a spoonful of the cream cheese mixture in the center of each pastry square. Fold the corners over towards the center to create a pocket.
Step 5: Brush with Egg Wash
In a small bowl, whisk together an egg with a tablespoon of water. Brush this mixture over each assembled Danish for a golden finish.
Step 6: Bake Until Golden
Transfer the pastries onto the prepared baking sheet and bake in preheated oven for about 20-25 minutes or until they are golden brown.
Transfer to plates and enjoy warm or at room temperature for the perfect finishing touch.

Tips and Tricks
Here are some helpful tips to ensure the best results for your dish:
- Room Temperature Ingredients: Ensure all dairy products are at room temperature for smoother mixing.
- Proper Puff Pastry Handling: Keep puff pastry cold until you’re ready to use it; work quickly when assembling.
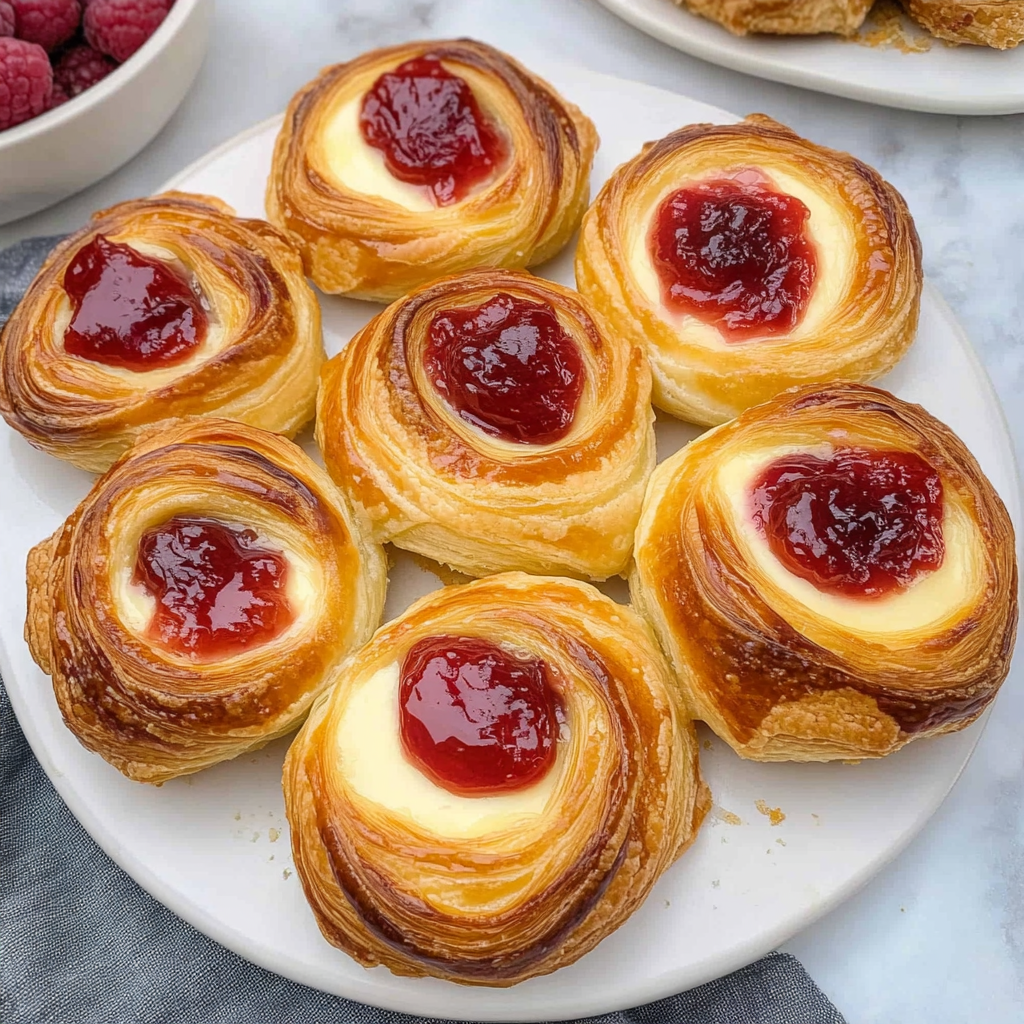
- Add Fruit Toppings: Consider topping your Cheesecake Danish with fresh berries or fruit preserves for added flavor.
By following these guidelines, you’ll create an impressive Cheesecake Danish that highlights both taste and presentation!
Looking for more? You can’t miss our delicious recipe!
How to Serve Cheesecake Danish
This Cheesecake Danish is versatile and pairs wonderfully with:
- Fresh Berries: Their natural sweetness and acidity complement the creamy cheesecake filling beautifully.
- Whipped Cream: A light, airy topping that enhances the rich flavors of the danish.
- Coffee or Tea: The warmth and slight bitterness balance the sweetness, making for a delightful pairing.
Feel free to pair it with your favorite sides for a personalized meal!

Make Ahead and Storage
- Make Ahead: You can prepare the filling and dough a day in advance. Store them separately in airtight containers in the refrigerator for up to 24 hours, allowing for quick assembly when you are ready to bake.
- Storing: Leftover Cheesecake Danish can be kept in an airtight container at room temperature for up to two days or in the refrigerator for up to five days. If storing longer, consider freezing it wrapped tightly in plastic wrap and foil for up to three months.
- Reheating: To reheat, place the danish on a baking sheet and warm it in a preheated oven at 350°F (175°C) for about 10-15 minutes or until heated through. This method helps maintain its flaky texture.
Get inspired by more mouthwatering recipes like this recipe!
Suggestions for Cheesecake Danish:
Use Fresh Ingredients
Using fresh ingredients is crucial when making a Cheesecake Danish. Fresh cream cheese, high-quality butter, and real vanilla extract enhance the flavor significantly. Avoid using expired or low-quality products, as they can lead to a bland and unappetizing pastry. Additionally, ensure that your fruits are ripe and sweet if you’re incorporating them into your recipe. Fresh ingredients not only improve the taste but also contribute to the overall texture of the Danish. If you must use frozen fruits, make sure to thaw and drain them properly to avoid excess moisture, which can ruin your filling.
Don’t Overmix the Dough
When preparing the dough for your Cheesecake Danish, it’s essential not to overmix. Overmixing can lead to a tough and chewy texture instead of the desired flaky and tender pastry. Mix just until combined; this helps maintain a light and airy consistency in your dough. If you see some small lumps of butter in the mixture, that’s perfectly fine! They will melt during baking and create steam pockets, leading to a flaky result. It’s better to err on the side of caution; you can always knead it gently a bit more if needed before rolling it out.
Allow Proper Cooling Time
Cooling time plays an important role in achieving the perfect Cheesecake Danish. After baking, let your pastries cool on a wire rack for at least 15-20 minutes before serving. This allows steam to escape, preventing sogginess while ensuring that the filling sets properly. If you serve them too hot, you risk losing that creamy cheesecake texture as it will still be quite runny inside. Waiting patiently enhances both flavor and presentation; your guests will appreciate it when they cut into a beautifully set Danish instead of one that oozes out.
Follow Baking Times Accurately
Baking times can vary depending on your oven’s calibration and the size of your Cheesecake Danish. Always keep an eye on them during baking to prevent undercooking or burning. Start checking at the lower end of the recommended baking time; this ensures that you catch any issues early on. Your pastries should be golden brown on top with filling that has just started to set in the center. Using an oven thermometer can help maintain accuracy in cooking temperatures and prevent any mishaps while baking.
FAQs:
What is a Cheesecake Danish?
A Cheesecake Danish is a delightful pastry that combines elements of traditional Danish dough with rich cream cheese filling. Often topped with fresh fruits or drizzled icing, this treat offers layers of flaky pastry complemented by creamy sweetness. The dough is typically made from flour, butter, sugar, yeast, and milk, creating a light texture that contrasts beautifully with its rich filling. Enjoyed as breakfast or dessert, these pastries have gained popularity for their versatility and delicious taste.
Can I freeze my Cheesecake Danish?
Yes, freezing your Cheesecake Danish is possible! To maintain optimal texture and flavor, allow them to cool completely after baking before sealing them in airtight containers or freezer bags. You can store them in the freezer for up to three months. When ready to enjoy them again, simply thaw overnight in the refrigerator or reheat directly from frozen in an oven until warmed through—this method helps restore some of their original flakiness without compromising their quality.
How do I prevent my Cheesecake filling from cracking?
To prevent cracking in your Cheesecake filling within a Danish pastry, ensure that all ingredients are at room temperature before mixing; this helps create a smoother batter. Avoid overbeating the mixture; excessive air incorporated into the batter can lead to cracks as it bakes. Also, consider adding sour cream or heavy cream for added richness—this contributes moisture while helping stabilize your filling during baking.
What variations can I make with my Cheesecake Danish?
There are endless variations you can try with your Cheesecake Danish! Consider adding different flavors to your cream cheese filling like lemon zest for brightness or chocolate chips for indulgence. You could also incorporate seasonal fruits such as berries or peaches into both the filling and as toppings for added freshness. Experimenting with spices like cinnamon or nutmeg can add warmth too—these variations will keep your recipe exciting while highlighting different flavor profiles!
Looking for more delicious inspiration? Check out this recipe!

Conclusion for Cheesecake Danish:
Creating a delicious Cheesecake Danish requires attention to detail and an understanding of key techniques. Remember to use fresh ingredients for optimal flavor while avoiding common mistakes like overmixing the dough or neglecting cooling times after baking. Following accurate baking times ensures perfect results every time you whip up this delightful treat. With various options available for customization—from fillings to toppings—your creativity knows no bounds! Whether enjoyed at breakfast or as an evening dessert, mastering this recipe will surely impress family and friends alike.

Cheesecake Danish
- Total Time: 40 minutes
- Yield: Makes about 8 servings
Description
Cheesecake Danish is a heavenly pastry that beautifully marries the rich, creamy essence of cheesecake with the flaky, buttery layers of Danish dough. Perfect for breakfast or as a delightful dessert, this easy-to-make recipe will impress your family and friends without requiring advanced baking skills. With just a handful of simple ingredients and straightforward steps, you can create mouthwatering pastries in no time. Top your Cheesecake Danish with fresh fruits or a drizzle of icing to elevate its appeal and flavor. Each bite promises a satisfying blend of textures and tastes, making it a versatile treat for any occasion.
Ingredients
- Puff pastry sheets
- Cream cheese
- Granulated sugar
- Vanilla extract
- Eggs
Instructions
- 1. Preheat your oven to 375°F (190°C) and line a baking sheet with parchment paper.
- 2. Roll out thawed puff pastry sheets on a floured surface and cut them into squares or rectangles.
- 3. In a mixing bowl, beat together softened cream cheese, sugar, vanilla extract, and one egg until smooth.
- 4. Place a spoonful of the cream cheese mixture in the center of each pastry square; fold corners toward the center to create pockets.
- 5. Brush assembled Danishes with an egg wash (beaten egg mixed with water).
- 6. Bake for 20-25 minutes until golden brown; cool slightly before serving.
Notes
Add fresh berries on top for added flavor and color.
Experiment with spices like cinnamon in the cream cheese mixture for extra warmth.
Store leftovers in an airtight container for up to five days or freeze for up to three months.
- Prep Time: 15 minutes
- Cook Time: 25 minutes
- Category: Dessert
- Method: Baking
- Cuisine: American
Nutrition
- Serving Size: 1 Danish (75g)
- Calories: 250
- Sugar: 10g
- Sodium: 200mg
- Fat: 15g
- Saturated Fat: 8g
- Unsaturated Fat: 7g
- Trans Fat: 0g
- Carbohydrates: 25g
- Fiber: 1g
- Protein: 4g
- Cholesterol: 45mg


